Post Submissions Here!
+39
aussiemarie
Pepita
TamaraRN
anramire2
Psalmbook
l!zzie
Mandi from Tazzie
skylark
wmeventservices
alezmata
Denise Cold
Manja
Rantzau
TickledPaint
Anita's Faces
giggles
Tash
Pilareta
designiak
Manabanana
kelly
Rae
elantaura
michellesfantasyfaces
mudder1102
delidee32
Creations
scgilland
Face Painting By Donna
gulaben
artyfacesbyluz
Angi
OtterGirl
jennvangogh
Jody Rife
SuzySparkles
Bee Happy Design
lorrinwagner
Metina
43 posters
Page 1 of 7
Page 1 of 7 • 1, 2, 3, 4, 5, 6, 7 
 Re: Post Submissions Here!
I can't wait to see what people come up with. I will have to think about this one!
 Re: Post Submissions Here!
My, my it's quiet in here! I'm afraid my submission would be a bit simple compared to some of the talent I've seen - particularly with the sugar skulls! Can't wait for some submissions here too!
 Re: Post Submissions Here!
I have a bunch of ideas for this one, just haven't had time yet... am excited for this one though!! 

SuzySparkles- Number of posts : 2778
Age : 46
Location : Wisconsin / Milwaukee
Registration date : 2009-11-09
 Re: Post Submissions Here!
I am excited about this challenge, not because I think I have a chance in the wind at winning but because I am really not that good at split designs! I am definitely going to try to enter this time around to challenge myself a bit! Can't wait to see what all of you split cake pros do on this one. 
 Re: Post Submissions Here!

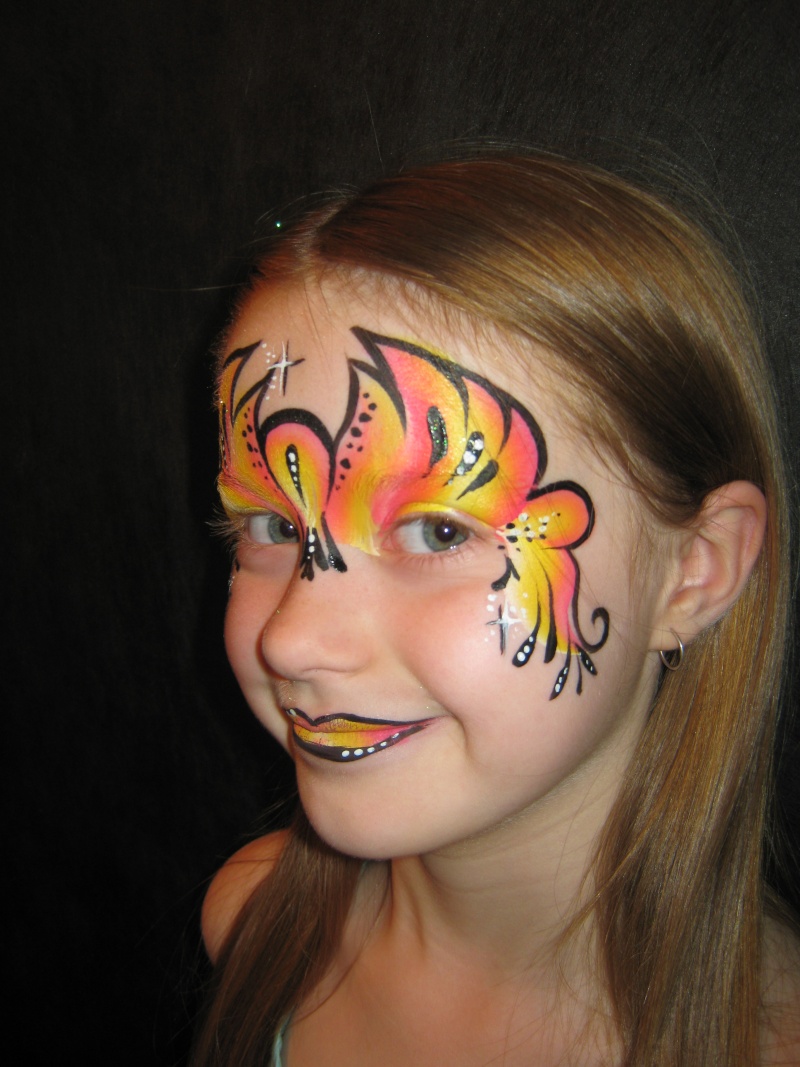
I used the tag one stroke cake called Tropical and a 3/4 flat brush and did one stroke on each eye and then one tear drop shape center and one on each corner of the eye then I made an s shape on each side of the eye and filled in a stroke between the eye and the tear drop. That was my base.

Using mehron black and a #3 round brush I outlines the design added some lines and dots. I also added swirls on the side outlining the "s"shape as well.

Using #3 round make more lines under the middle tear drop and on the side of each eye. Using the same brush add star outlines in black. Then with mehron white and #3 brush add white dots and stars to finish top part of the design.

Complete the design by painting the lip ( steralized materials required before and after) Using a 3/4 inch flat brush paint the lips in the stripes of the one stroke cake flip colours and do opposit side to get white in the middle.Then outline with mehron black adn #3 round brush. Add white dots with round brush#3 and mehron white.
I then misted with water and added a poof of irredescent white glitter.
Here is my finished product pictures:
side:
front head on picture:
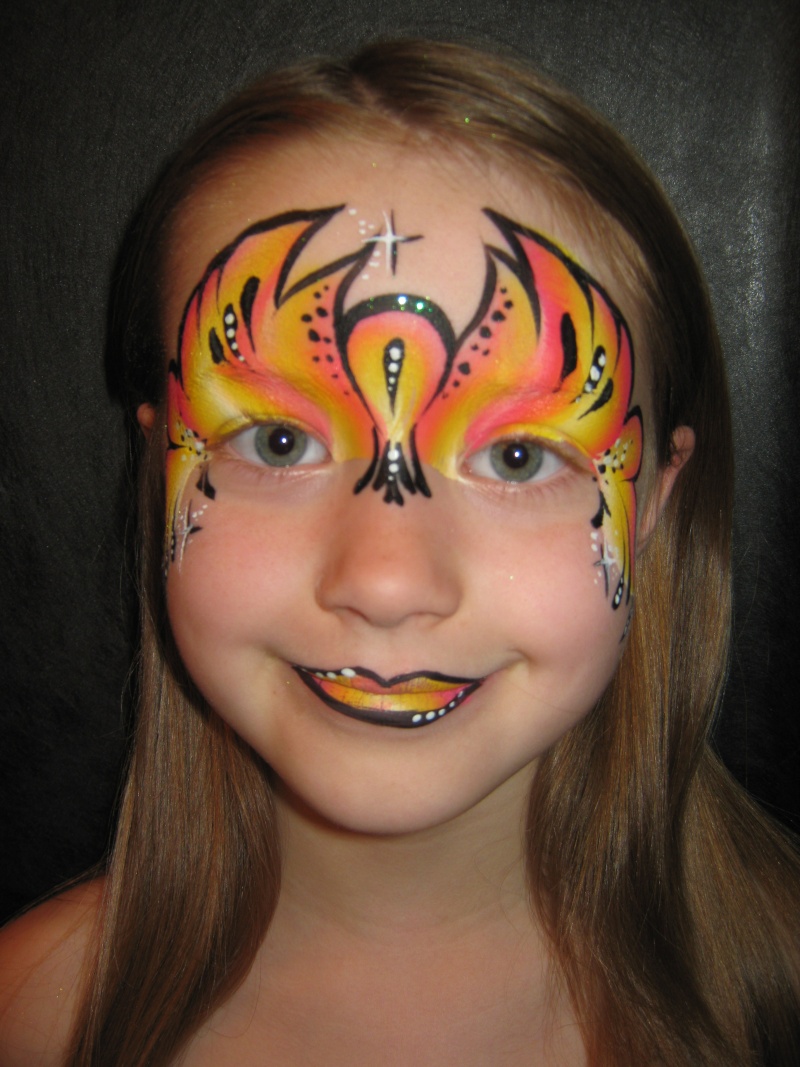
Hope I explained it enough... written instructions gotta say not my strong suit! Hope you like it!
 Re: Post Submissions Here!
do one stroke cakes count as split cakes? Or do they have to be only two colours to count? I guess I should have asked that before posting. 
 Re: Post Submissions Here!
It's a lovely design! I've been wanting to create a set of mask designs for the four elements (earth, air, fire, water), and I think this would be a good base for a fire design.
 Re: Post Submissions Here!
That's very pretty!

Angi- Number of posts : 224
Age : 49
Location : Marysville CA
Registration date : 2011-07-05
 Re: Post Submissions Here!
Love it, love it, love it ,and congratulations on being so brave to be the first one to post.
 Re: Post Submissions Here!
This is painted on my leg but would usually go on the arm, though it would be easy to alter to a back design.
Used TAG white, black, snake one stroke and dragon one stroke. Paintbrushes are one liner and a flat brush( i think its a 3/4 inch but i could be wrong).

Paint the bodies, using each one stroke cake for each. Overlap the bodies.
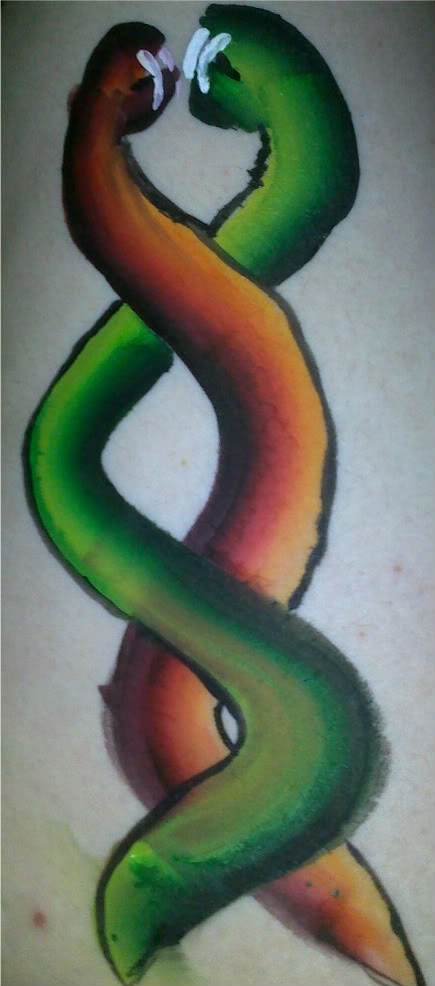
Outline bodies and paint in fangs.

Paint in scales then lines on the back.
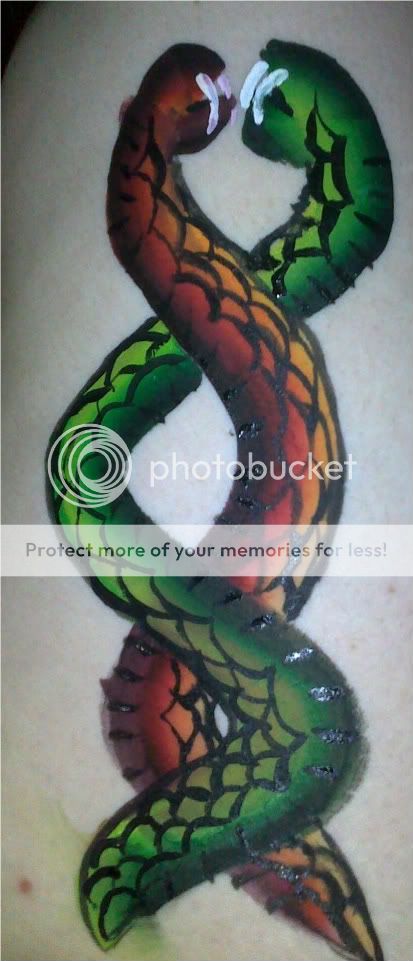
Paint in eyes ( I use the colours from the opposite one stroke) and tounges.

ps i edited these but they are turning up as the unedited versions . UGh ill post it for now and fix it when i get up in the morning.
Used TAG white, black, snake one stroke and dragon one stroke. Paintbrushes are one liner and a flat brush( i think its a 3/4 inch but i could be wrong).

Paint the bodies, using each one stroke cake for each. Overlap the bodies.

Outline bodies and paint in fangs.

Paint in scales then lines on the back.

Paint in eyes ( I use the colours from the opposite one stroke) and tounges.

ps i edited these but they are turning up as the unedited versions . UGh ill post it for now and fix it when i get up in the morning.
gulaben- Number of posts : 25
Registration date : 2011-03-16
 Re: Post Submissions Here!
I used leaf yellow one stroke cake by tag and a 3/4 flat brushand mehron black and red and white with a #3 round brush.

I made lines curving on arm to look like it is going into arm and out again. Using black I made curved lines to show the skin line defined more.

Then I added lines and dots in white and black for details and then red for blood dripping out of the areas the snake enters the skin all with a #3 round brush.

Using the 3/4 flat brush I made the snake head with three curved lines all with the yellow facing in for the center of the head. I outlines with black and added details for the eyes and toungue with the #3 brush and the black yellow and red.

A few more details fangs and bite marks with blood cause more blood the better I find for older boys.
And here is the finished product:
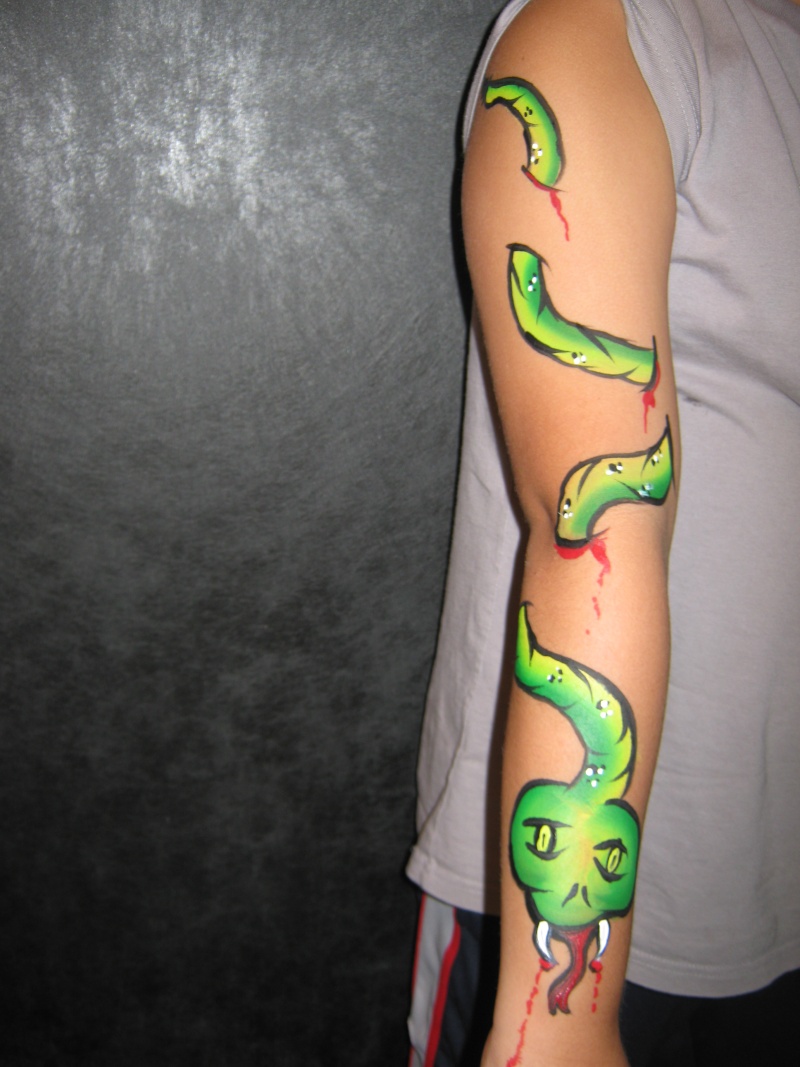
Not the most original but the first idea that came to mind when I look at my leaf yellow one stroke cake! Enjoy!

I made lines curving on arm to look like it is going into arm and out again. Using black I made curved lines to show the skin line defined more.

Then I added lines and dots in white and black for details and then red for blood dripping out of the areas the snake enters the skin all with a #3 round brush.

Using the 3/4 flat brush I made the snake head with three curved lines all with the yellow facing in for the center of the head. I outlines with black and added details for the eyes and toungue with the #3 brush and the black yellow and red.

A few more details fangs and bite marks with blood cause more blood the better I find for older boys.
And here is the finished product:

Not the most original but the first idea that came to mind when I look at my leaf yellow one stroke cake! Enjoy!
 Re: Post Submissions Here!
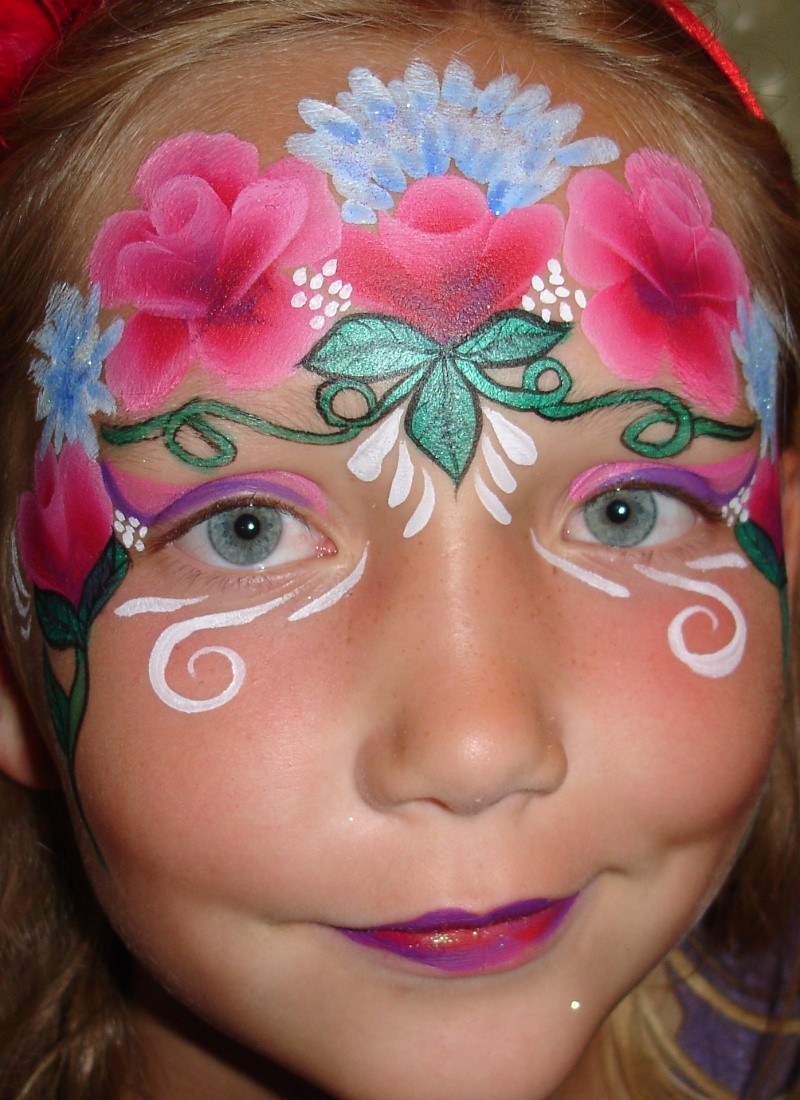
I used TAG berry split cake and a 3/4" flat brush, DFX white and blue on a #6 round brush, TAG Pearl green on a 1/2" flat brush and a #2 round brush, and Wolfe Black on a 0 round brush. TAG pearl pink and purple on a #2 round brush. I used Mama clown irridescent glitter.
1. Start the rose by using the TAG berry cake with a 3/4" flat brush making an upside down u, and then on top of that a right side up U. Then at the edge of each side keep the bottom part of the brush in the same spot and drag the brush to make a petal shape. Repeat on either side of the head.
2. Add a carnation by using a large round brush(#6) and load well with DFX white and dip the tip in the DFX blue. Then make the carnation petals by laying down your brush with the blue pointing to the center. Add glitter while wet.
3. Take the 1/2" flat brush and load with TAG pearl green and kind drag it flat in a "S" like curve to make leaf shapes.
4. Take the #2 round brush and make vines swirling from the center flower.
5. Use the 0 brush with wolfe black to make outlines and lines in the leaves.
6. Use the TAG pearl pink to make eyeshadow and pearl purple as eyeliner and add glitter.
7. Add tear drops, swirls and dots for baby's breath.


 Re: Post Submissions Here!
Fire and Ice Dragon Design - (first attempt at monthly challenge!)

Material Used -
Tag custom made split cakes - (yellow, orange and red) (white, powder blue, teal and royal blue)
Tag White and Black
Brushes - 1" Francheville Flat brush , 8 Tag Flat brush, Size 2 + 4 Roymac
Husband Back!!

1. Using the fire one stoke custom cake and the 1" brush make the head and hair of the dragon. Then attaching to the head add a snake like body and tail ending in a pointed tail. Now add a batwing onto the body. With the 8 Tag brush add spikes to either side of the body making sure to end in a sharp point.

2.Using the custom made ocean one stoke and the 1" flat brush do the same as step one, but to vary the wing and tail to give the effect that they are diffirent dragons.

3. Using the Roymac no.4 add in the details - eye, nose, teeth and outline the dragons entire body. Shade in the spikes a little, aswell as the tail/ horns. Now add highlights in white using the no. 2 roymac.

4. Finally add the flames and a icy breath and your done.
 [u]M
[u]M

Material Used -
Tag custom made split cakes - (yellow, orange and red) (white, powder blue, teal and royal blue)
Tag White and Black
Brushes - 1" Francheville Flat brush , 8 Tag Flat brush, Size 2 + 4 Roymac
Husband Back!!

1. Using the fire one stoke custom cake and the 1" brush make the head and hair of the dragon. Then attaching to the head add a snake like body and tail ending in a pointed tail. Now add a batwing onto the body. With the 8 Tag brush add spikes to either side of the body making sure to end in a sharp point.

2.Using the custom made ocean one stoke and the 1" flat brush do the same as step one, but to vary the wing and tail to give the effect that they are diffirent dragons.

3. Using the Roymac no.4 add in the details - eye, nose, teeth and outline the dragons entire body. Shade in the spikes a little, aswell as the tail/ horns. Now add highlights in white using the no. 2 roymac.

4. Finally add the flames and a icy breath and your done.
 [u]M
[u]MLast edited by Kye on Sat Sep 17, 2011 8:37 pm; edited 1 time in total
 Re: Post Submissions Here!
love the fire and ice and the floral mask. I will have to try these out great ideas!
Looking at my brush today and now I am thinking maybe I posted the wrong brush number... problem with using my brushes a lot the number rubs off... so maybe it was #2? who knows... I guessed three but I am thinking I was wrong now.
Looking at my brush today and now I am thinking maybe I posted the wrong brush number... problem with using my brushes a lot the number rubs off... so maybe it was #2? who knows... I guessed three but I am thinking I was wrong now.
 Re: Post Submissions Here!
Love the dragons!!! I think I'm gonna have to give this a go!! Now to find a willing guinea pig, my kids run when they see me pick up my paints 
 Re: Post Submissions Here!
I'm loving the juxtaposition of dainty masks and coiled reptiles. What fun! I wish I was better with split cakes. I can never seem to get the colors opaque enough. Maybe it's my brush?
 Re: Post Submissions Here!
I am loving my misting bottle. I just mist then swipe the brush and avoid dipping the brush in the water it allows for a darker colour pigment and no smudged colours.
 Re: Post Submissions Here!
mudder1102 wrote:C:\Documents and Settings\User\My Documents\My Pictures\2011-09-14
get a free acount at for instance photobucket.com
upload your pictures there and copy the [img ]bladibladibla.jpg [/img ] code and paste it in your reply (open a different window in internet for this, so you can switch between the forum and photobucket
also for instance if you have a facebooksite or other site where your pic is..rightclick on the picture and then properties or atributes..copy the complete http:bladibladibla.jpg code
 click this icon..then paste the jpg code and then hit the same button again and voila...
 Re: Post Submissions Here!
Alright I am nervous but keep reading that this is about challenging yourself so here goes and if I have broken the rules in anyway as I am new could someone please tell me. I am going to post this without looking at others of I will never do it.
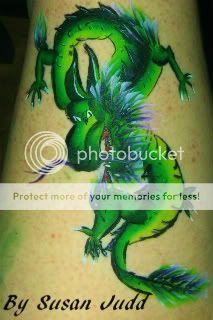
Tools
Loew-cornell 0 liner
Loew-cornel ¼ chisel
Royal- 5 - round
Royal 10- flat
Tag - flat 12 (has no name on it)
Cakes
Tag - Black Iris
Tag – Snake
Tag - Rose (as it was close just used red from it)
Wolfe – white
Tag – black (as I ran out of Wolfe and can’t seem to get any)
Step 1 using 12 flat make dragon body shape (in snake colour) flip brush over follow top line going over black bit for the top
Step 2 using flat 12 make head shape followed by lower jaw then horns
Step 3 using number 10 fat make legs and toes
Step 4 using 12 flat add wisps/feathers to joints of legs, tail and head ( in snake) was brush and repeat same process with a layer of tag black iris but not as many
Step 5 load chisel brush with black and purple from iris cake make ridges on back with this and top two whiskers from mouth/nose. Add a few light marks where tummy scales will go
Step 6 use 5 round to make tongue in red.
Step 7 outline in black, add scales, belly details draw eye around etc.
Step 7 and 1/2 realise that every other liner brush is in the room with the sleeping baby was the hell out of liner brush
Step 8 load liner brush in white add teeth claws back ridge highlights then anywhere else you feel like
Step 9 after eye is dry add slit
Step 10 realise you that your photos show you undies, hairy legs and cellulite and consider not posting, but what the hell.
Sue
Last edited by elantaura on Sat Sep 17, 2011 11:22 am; edited 2 times in total (Reason for editing : figured out how to make slideshow yay)
Page 1 of 7 • 1, 2, 3, 4, 5, 6, 7 
 Similar topics
» Post your submissions here!
» Post Submissions Here!
» Post Submissions Here!
» Post Submissions Here!
» Post Submissions Here!
» Post Submissions Here!
» Post Submissions Here!
» Post Submissions Here!
» Post Submissions Here!
Page 1 of 7
Permissions in this forum:
You cannot reply to topics in this forum


