

My process- very image heavy

My process- very image heavy
![]() by Lynnie Mon May 17, 2010 1:25 pm
by Lynnie Mon May 17, 2010 1:25 pm
Ingredients and supplies:

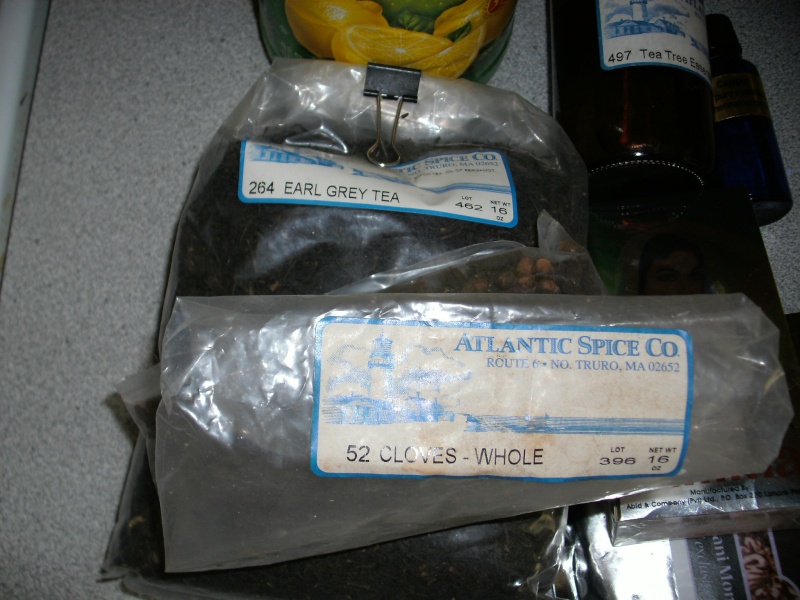
Step one: Simmer on low herb of choice in lemon juice (this is Earl Grey Tea). I usually do this until the liquid turns brownish and steam is coming from it, about 10 minutes. I was taught against using metal (aluminum) and non-stick pans, so I used glass or coated ones like this. When it's done, I just turn off the burner and let it sit on the stove and cool to tepid/room temp.

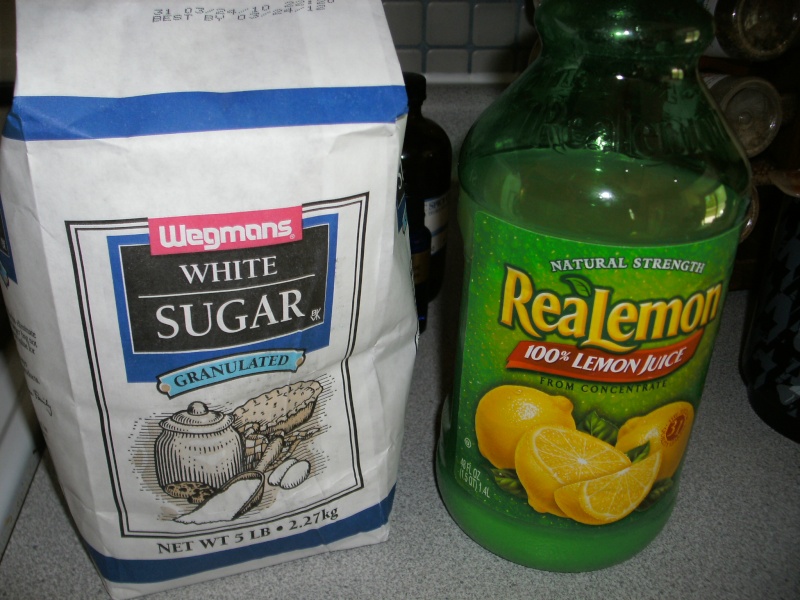
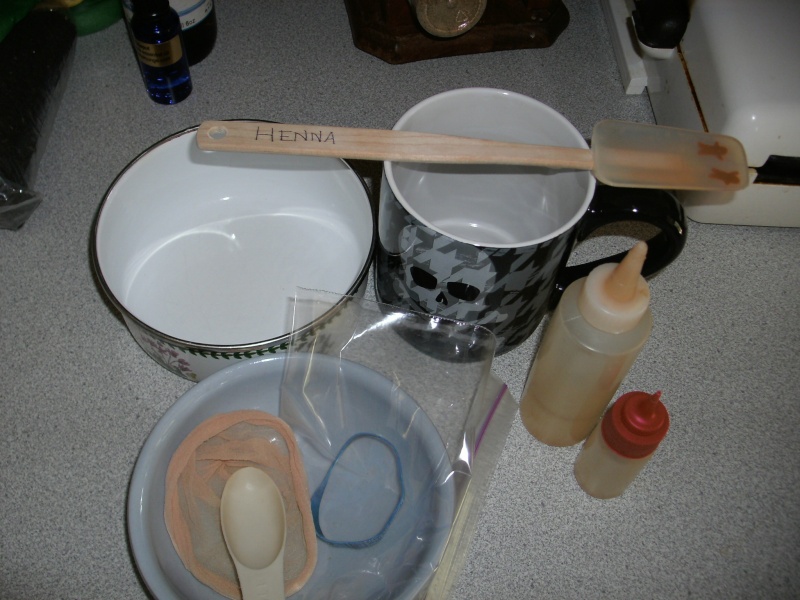
Step Two: While that's simmering, I mix the henna and sugar. I start with a ratio of 2pts henna to 1pt sugar and add more sugar later to the paste if needed. I took the photo to show this but before I add the liquid I mix this up to remove any sugar clumps and to mix it all through.

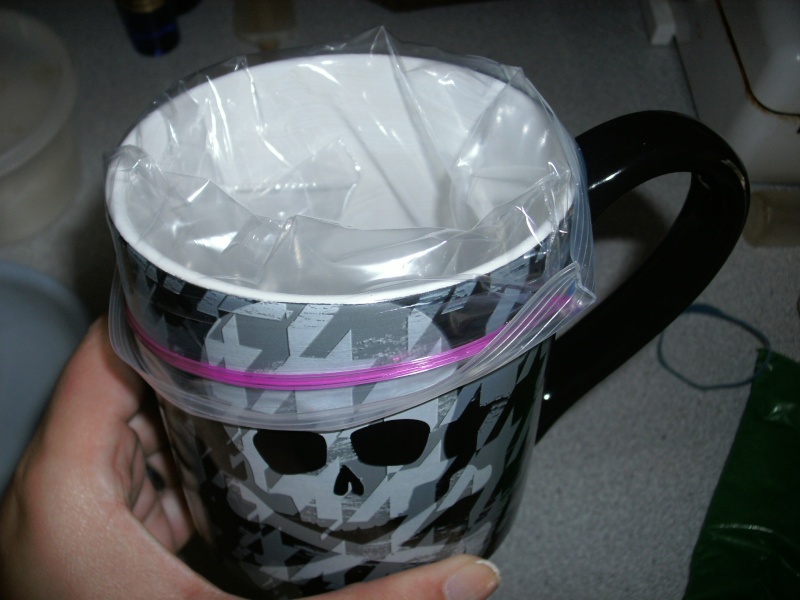
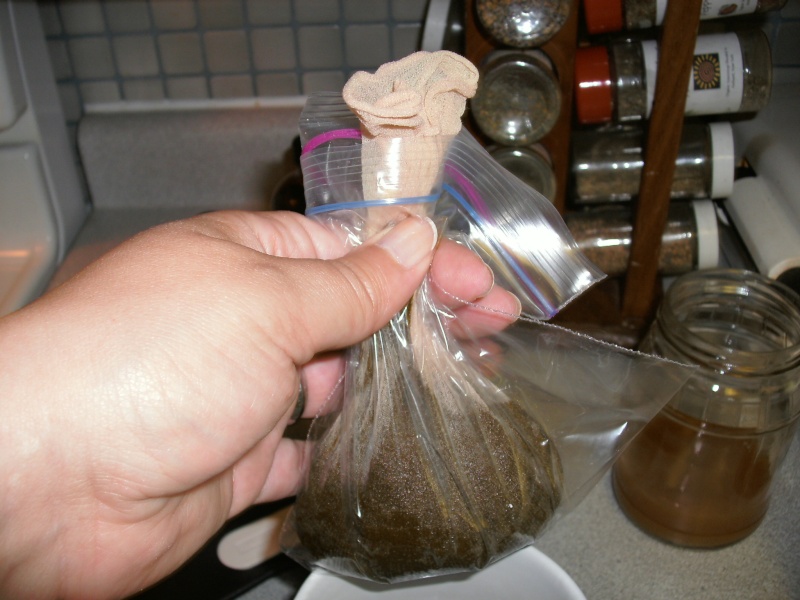
Step Tres: Prepping the materials. I stick the baggie in the cup, folding the top edge of the baggie around the mouth of the cup. Then I put the toe of stocking into the baggie, also folding the top around the edges of the cup. I secure them both in place with a rubber band.

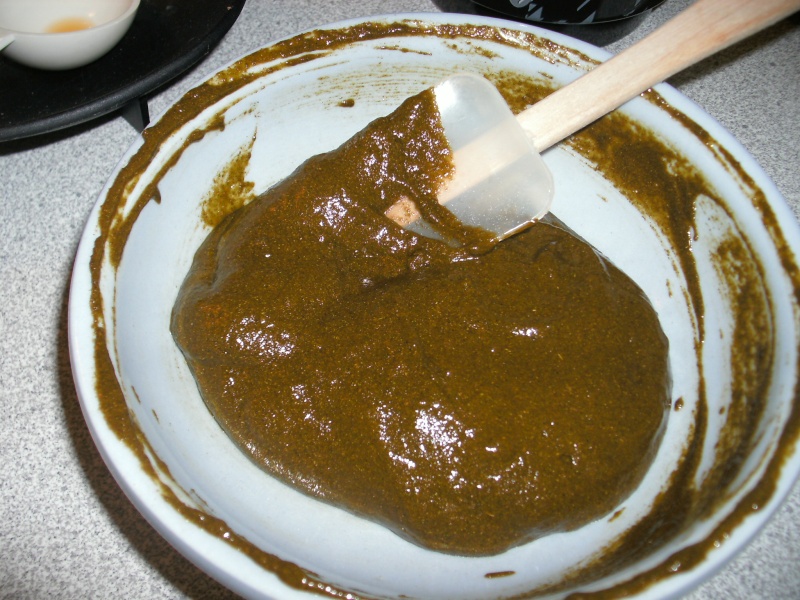
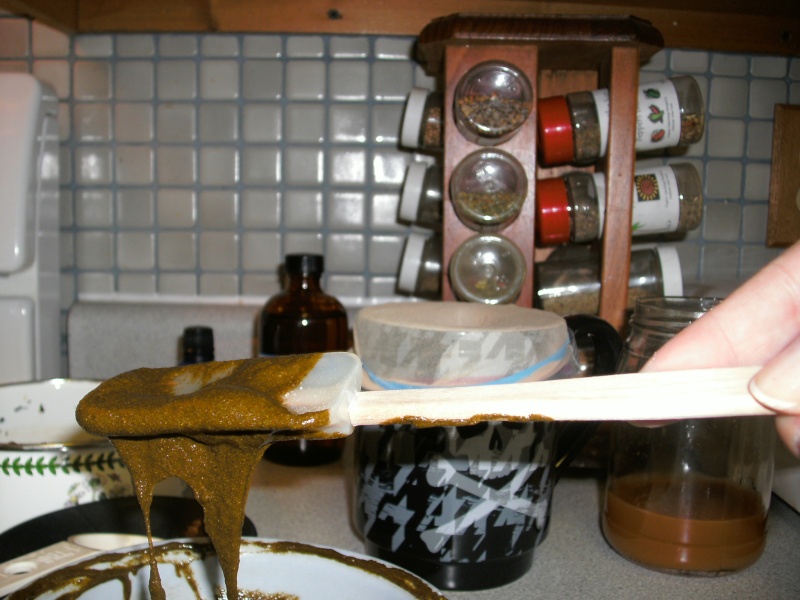
Quad Step: Once the liquid has cooled, gets strained into a clean jar. Then I add it in a 3:2:1 ratio (3pts liquid to the 2 henna and 1 sugar). I mix this and check the consistency. If it's too thick, I add more liquid in smaller bits. It kinda forms a pudding ball in the middle of the ceramic bowl I mix in. This is also when I pull my spatula out to test for stringiness. If it the henna clumps, falls or doesn't "pull" then I add a bit more sugar to get the stringy elasticity I want.

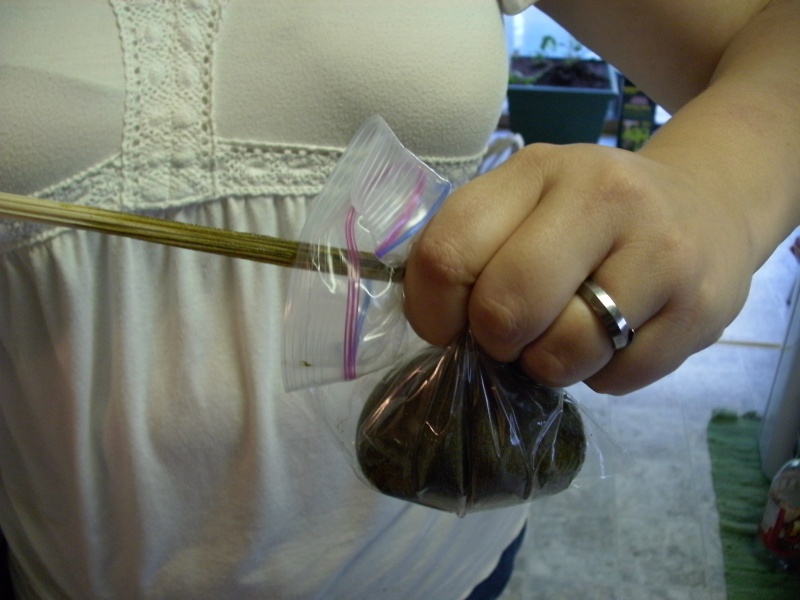
Step V: The sifting. The paste then gets put into the stocking in the cup. Once all in there I remove the rubber band and hold the top of the stocking. I grab the baggie in my other hand and pull the stocking, using the thumb and forefinger of the hand holding the baggie to press the henna through the stocking. It acts like a fine sifter and captures any clumps that might clog later, releasing it into the baggie which also makes filling bottles so much easier!
The stocking can be rinsed/washed in the sink and reused many times.


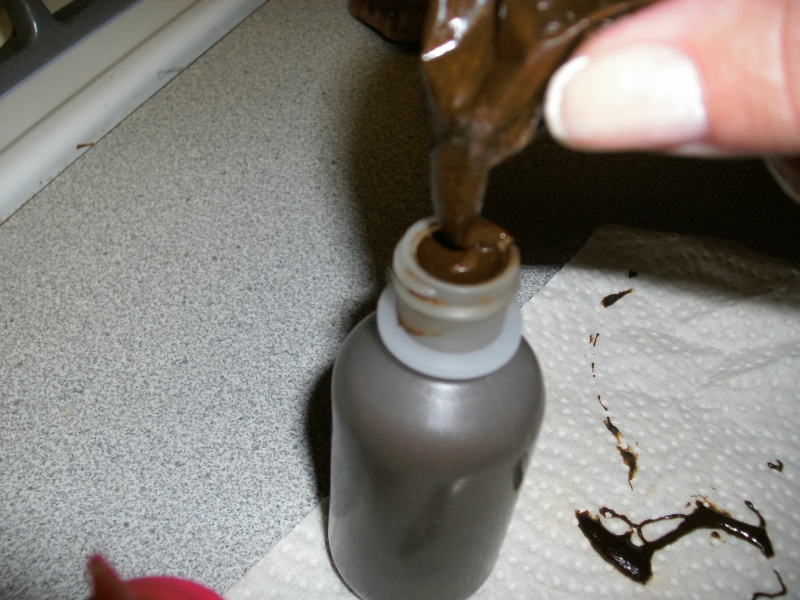
Finishing up. The henna is in the baggie and all is right with the world. I add about 10-20 drops of terp oil to the bag and squish it around to mix it up. The henna slides down the side instead of sticking...that's when you know it's mixed. Then, I leave the henna in the baggie. I wrap a strip of paper towel around it like a burrito and let it sit. The stains will start to seep through the baggie and into the paper towel giving the paper towel a slight orange tint (that doesn't show up in photos btw), this is a no fail way of telling when your henna is ready. I snip the corner off the baggie and squeeze the henna in a cake decorators bottle. I find this is the easiest way to fill and refill my jaquard bottles, and because I can cap it off nicely, I can just stick the bottle in the fridge or freezer and use when needed.


I've never had this process fail and, outside of cooling time, it takes me about 10-15 minutes.
I've found that an exact recipe is never really exact because it will change based on weather conditions.
Hope you enjoyed!
Last edited by Lynnie on Mon May 17, 2010 1:28 pm; edited 1 time in total (Reason for editing : grammar :))

Lynnie- Number of posts : 733
Age : 50
Location : Rochester, NY
Registration date : 2010-02-09 -

Re: My process- very image heavy
![]() by Psalmbook Mon May 17, 2010 5:08 pm
by Psalmbook Mon May 17, 2010 5:08 pm

Psalmbook- Number of posts : 7642
Location : JAX, FL
Registration date : 2010-03-09 -
Re: My process- very image heavy
![]() by Lynnie Mon May 17, 2010 5:12 pm
by Lynnie Mon May 17, 2010 5:12 pm
I made brownies one day, then made henna and got some on my finger. I didn't even think about it and I licked it off like I would brownie batter...OMG so gross!!!
Lynnie- Number of posts : 733
Age : 50
Location : Rochester, NY
Registration date : 2010-02-09 -
Re: My process- very image heavy
![]() by Psalmbook Mon May 17, 2010 5:20 pm
by Psalmbook Mon May 17, 2010 5:20 pm
Psalmbook- Number of posts : 7642
Location : JAX, FL
Registration date : 2010-03-09 -
Re: My process- very image heavy
![]() by Lynnie Mon May 17, 2010 5:24 pm
by Lynnie Mon May 17, 2010 5:24 pm
I have this process streamlined where I don't even get it on my hands and I don't wear gloves (as you can see). That baggie trick is completely awesome for staying clean!!!
I had one henna 'splosion once but I've been sworn to secrecy by the gov't lest I give away secret to the anomalous creatures that came from it. I can say it involved a 12 year old running through the kitchen and my cat. Sad times...but funny.
Lynnie- Number of posts : 733
Age : 50
Location : Rochester, NY
Registration date : 2010-02-09 -
Re: My process- very image heavy
![]() by Linda Adams Mon May 17, 2010 5:27 pm
by Linda Adams Mon May 17, 2010 5:27 pm
....*raises hand*
What does the Earl Grey Tea do?
I've always just used plain lemon juice out of a bottle.
Thank you for the tip with straining it into the plastic bag.
GENIUS!!!
I ALWAYS get it all over myself so I wear gloves! : )

Linda Adams- Number of posts : 563
Age : 64
Location : North Carolina
Registration date : 2009-04-30 -
Re: My process- very image heavy
![]() by Lynnie Mon May 17, 2010 6:23 pm
by Lynnie Mon May 17, 2010 6:23 pm
It smells nice too
Clove oil can be used as a terp as well, plus they have tannens in them, so by using cloves I can kill two birds with one stone. I'm just waiting for my new supply of cloves to arrive. As you can see by my bag, it's my favorite of the two...but I love the smell of cloves.
Hopefully the baggie will help you too!
Lynnie- Number of posts : 733
Age : 50
Location : Rochester, NY
Registration date : 2010-02-09 -
Re: My process- very image heavy
![]() by photomomma6 Wed Apr 27, 2011 11:12 pm
by photomomma6 Wed Apr 27, 2011 11:12 pm

photomomma6- Number of posts : 466
Age : 56
Location : Anderson, IN
Registration date : 2009-08-31 -
Re: My process- very image heavy
![]() by Amy Moon Thu Apr 28, 2011 12:25 am
by Amy Moon Thu Apr 28, 2011 12:25 am

Amy Moon- Number of posts : 221
Age : 48
Location : Renton Wa
Registration date : 2011-01-03 -
Re: My process- very image heavy
![]() by Mehndi Masala Thu Apr 28, 2011 1:02 am
by Mehndi Masala Thu Apr 28, 2011 1:02 am

Mehndi Masala- Number of posts : 1314
Location : Winnipeg
Registration date : 2010-12-04 -
Re: My process- very image heavy
![]() by photomomma6 Fri Apr 29, 2011 1:21 am
by photomomma6 Fri Apr 29, 2011 1:21 am
photomomma6- Number of posts : 466
Age : 56
Location : Anderson, IN
Registration date : 2009-08-31 -
Re: My process- very image heavy
![]() by Lynnie Sat Apr 30, 2011 11:43 am
by Lynnie Sat Apr 30, 2011 11:43 am
To answer your question about the tea- I make a "tea" out of lemon juice, clove buds and earl grey tea. That's the weird concoction pictured in the pan. When that cools I strain off the tea and clove buds and that is the liquid I use to mix into my henna.
I've used cloves for over 10 years and not had a single reaction, and I have tonnes of repeat customers through the tattoo shops, schools, universities and festivals. In fact, I've seen/had more reactions to other things being used. I know a henna artist who puts lavender in hers and she made the news for sending a pregnant woman into an asthmatic attack. I also post the ingredients (not proportions, just a list) in our booth so people know it's all natural and in case of allergies. I'm a huge stickler on that stuff (won't use natural bristle brushes when I paint either) on allergies because my mom is allergic to nearly everything.
Lynnie- Number of posts : 733
Age : 50
Location : Rochester, NY
Registration date : 2010-02-09 -
Re: My process- very image heavy
![]() by Amy Moon Sat Apr 30, 2011 8:14 pm
by Amy Moon Sat Apr 30, 2011 8:14 pm
Generally lavender is thought to be the safest but I find the sent too hard to handle. Thankfully bellies are not my general clientele.
Amy Moon- Number of posts : 221
Age : 48
Location : Renton Wa
Registration date : 2011-01-03 -
Re: My process- very image heavy
![]() by TheGildedCat Sat Apr 30, 2011 8:29 pm
by TheGildedCat Sat Apr 30, 2011 8:29 pm

TheGildedCat- Number of posts : 1577
Age : 43
Location : Portland, OR
Registration date : 2010-09-06 -
Re: My process- very image heavy
![]() by Lynnie Sat Apr 30, 2011 8:55 pm
by Lynnie Sat Apr 30, 2011 8:55 pm
Amy, lavender and rose/geranium both can trigger asthma in non-pregnant women as well because it is strong. They are also a powerful allergy triggers.
Cloves/Clove buds are the same thing. They can be picked up at any grocery store spice area. They are dried so using them is very different than using clove oil. I get mine by the bag full from the Atlantic Spice Company (same with my tea and other spices lol).
Lynnie- Number of posts : 733
Age : 50
Location : Rochester, NY
Registration date : 2010-02-09 -
Re: My process- very image heavy
![]() by Psalmbook Sat Apr 30, 2011 9:22 pm
by Psalmbook Sat Apr 30, 2011 9:22 pm
Lonnie,
In fact, I just ordered some more henna as I'd used up the bag you sent me! That was some great henna to learn w/ and although it was old, it still worked great!
My daughter has become a henna fan & loves to make henna designs.
My next venture is to learn how to roll cones. The Jac bottles are too painful & clog to much for my liking.
Psalmbook- Number of posts : 7642
Location : JAX, FL
Registration date : 2010-03-09 -
Re: My process- very image heavy
![]() by ChangingFaceDesigns Mon Jun 27, 2011 6:30 pm
by ChangingFaceDesigns Mon Jun 27, 2011 6:30 pm
Don't think i will be attempting to make any henna, maybe down the road, but for now I will just get it ready made from ABA. I was able to bring some home that was made in class and the cones i made are in my freezer...now just need to try something

ChangingFaceDesigns- Number of posts : 1559
Location : New Jersey
Registration date : 2010-04-20 -
Re: My process- very image heavy
![]() by TheGildedCat Thu Jul 07, 2011 11:54 pm
by TheGildedCat Thu Jul 07, 2011 11:54 pm
TheGildedCat- Number of posts : 1577
Age : 43
Location : Portland, OR
Registration date : 2010-09-06 -
Re: My process- very image heavy
![]() by photomomma6 Mon Aug 22, 2011 5:15 pm
by photomomma6 Mon Aug 22, 2011 5:15 pm
Let me know!
photomomma6- Number of posts : 466
Age : 56
Location : Anderson, IN
Registration date : 2009-08-31 -
Re: My process- very image heavy
![]() by Linda Adams Mon Aug 22, 2011 8:27 pm
by Linda Adams Mon Aug 22, 2011 8:27 pm
BTW...I never add water, just lemon juice & essenital oils.
Linda Adams- Number of posts : 563
Age : 64
Location : North Carolina
Registration date : 2009-04-30 -
Re: My process- very image heavy
![]() by photomomma6 Mon Aug 22, 2011 11:06 pm
by photomomma6 Mon Aug 22, 2011 11:06 pm
photomomma6- Number of posts : 466
Age : 56
Location : Anderson, IN
Registration date : 2009-08-31 -
Re: My process- very image heavy
![]() by Mehndi Masala Sun Aug 28, 2011 8:37 am
by Mehndi Masala Sun Aug 28, 2011 8:37 am
This may help you on that one
Aftercare and FAQ - http://www.winnipeghenna.com/hennaFAQaftercare.html
Hang in there and see what happens!
Mehndi Masala- Number of posts : 1314
Location : Winnipeg
Registration date : 2010-12-04 -
Re: My process- very image heavy
![]() by Amy Moon Sun Aug 28, 2011 9:50 am
by Amy Moon Sun Aug 28, 2011 9:50 am
Amy Moon- Number of posts : 221
Age : 48
Location : Renton Wa
Registration date : 2011-01-03 -
» TAG one stroke cake swipes
» Some henna I've done lately (pic heavy)
» Paradise vs TAG
» Had to Share!!!! Pic heavy
|
|
|